WordPress

6 Best Cache Plugins For WordPress Site
WordPress

6 Best Cache Plugins For WordPress Site

Interested in knowing about the 6 best cache plugins for WordPress site. Cache plugin helps your WordPress site to load faster. WordPress is used widely throughout the world, for websites and blogs, and the wordpress community has developed a huge repository of plugins for extending its functionality. One of the most important plugins in that repository are cache plugins. In today’s article we are going to check out, what cache plugins are and how they can be used. What Is Cache Plugin To know what cache plugin is, we will first have to understand what cache is. Cache is a hardware or software component that stores data temporarily, so that future requests for that data can be served faster. The data stored in a cache might be the result of an earlier computation or a copy of data stored elsewhere. The data stored is usually in static form. For example, when you are browsing a page for the very first time, your computer sends a request to the server, where the data is stored and the server then sends back the requested data to your computer. This transfer of data can take some time. If you have cache enabled on your system, this data would get stored in that cache memory temporarily, so that when you request the same page again, rather than requesting the data from the server, the temporarily stored data in the cache will be called and displayed. This allows the data to load faster and decrease the lag time. In wordpress there are many plugins which can help your in caching the data . These plugins are known as cache plugins. We will have a look at a few such cache plugins. Why Use Cache Plugins As your website gets bigger, more and more data will be archived and the website will start to slow down. To avoid this problem and to manage your cache data, cache plugins are used. With the help of cache plugins, you can also clear the cache memory if required, which will in turn allow your website to run faster and create a cache for new pages and posts. 6 Best Cache Plugins For WordPress Site Below is a list of 6 best cache plugins for WordPress site. You will need to install & activate the plugins before using it. In case you don’t know how to install & activate a WordPress plugin check out our article on, how to install and activate a WordPress plugin. W3 Total Cache This plugin is also known as W3TC & improves the SEO & user experience of your website. It does so by increasing the performance, reducing load times & by leveraging features like content delivery network (CDN) integration and the latest best practices. Also, It is a web host agnostic Web Performance Optimization (WPO) framework for WordPress trusted by millions of publishers, web developers, and web hosts worldwide for more than a decade. W3 Total Cache is the total performance solution for optimizing your WordPress Website. There are two ways of installing this plugin. You can download the plugin, directly from the official website of wordpress and then upload, install & activate it in your wordpress website, or you can directly install & activate it from the plugins section of your wordpress website dashboard. The W3TC plugin is free to use and has an overall rating of 4.3 out of 5 with 1251 votes. WP Super Cache This plugin generates static html files from your dynamic WordPress blog. After a html file is generated your webserver will serve that file instead of processing the comparatively heavier and more expensive WordPress PHP scripts. The static HTML files will be served to the vast majority of your users, users who are not logged in, users who have not left a comment on your blog or users who have not viewed a password protected post. 99% of your visitors will be served static HTML files. One cached file can be served thousands of times. Other visitors will be served custom cached files tailored to their visit. If they are logged in, or have left comments those details will be displayed and cached for them. The plugin serves cached files in 3 ways (ranked by speed): Expert. The fastest method is by using Apache mod_rewrite (or whatever similar module your web server supports) to serve “supercached” static html files. This completely bypasses PHP and is extremely quick. If your server is hit by a deluge of traffic it is more likely to cope as the requests are “lighter”. This does require the Apache mod_rewrite module (which is probably installed if you have custom permalinks) and a modification of your .htaccess file which is risky and may take down your site if modified incorrectly. Simple. Supercached static files can be served by PHP and this is the recommended way of using the plugin. The plugin will serve a “supercached” file if it exists and it’s almost as fast as the mod_rewrite method. It’s easier to configure as the .htaccess file doesn’t need to be changed. You still need a custom permalink. You can keep portions of your page dynamic in this caching mode. WP-Cache caching. This is mainly used to cache pages for known users, URLs with parameters and feeds. Known users are logged in users, visitors who leave comments or those who should be shown custom per-user data. It’s the most flexible caching method and slightly slower. WP-Cache caching will also cache visits by unknown users if super caching is disabled. You can have dynamic parts to your page in this mode too. This mode is always enabled but you can disable caching for known users, URLs with parameters, or feeds separately. Set the constant “DISABLE_SUPERCACHE” to 1 in your wp-config.php if you want to only use WP-Cache caching. If you’re not comfortable with editing PHP files then use simple mode. It’s easy to set up and very fast. Recommended Settings Simple caching. Compress pages. Don’t

4 Easy Ways To Fix 404 Error In WordPress
WordPress

4 Easy Ways To Fix 404 Error In WordPress

In this article you will know what a 404 error is and 4 easy ways to fix 404 error in WordPress. A 404 error, also known as a “Page Not Found” error occurs when your browser is unable to locate the post or page you’re trying to access. This usually happens when you have deleted a post or page from your WordPress site but someone tries to access it through the URL. It can also happen if someone has mistyped the URL by mistake or if there is a problem with the permalink structure of the website. If you don’t fix this error then your audience will get frustrated and might decide to opt out of your website. 404 errors can also damage the overall Search Engine Optimization (SEO) of your WordPress site. Let’s check the main causes of this error and how to fix those causes. 4 Easy Ways To Fix 404 Error In WordPress So without further ado, let’s see the 4 easy ways to fix 404 error in WordPress. Reset Your WordPress Site Permalinks This is the first thing you should do when you get a 404 error. To reset your WordPress site permalinks go to Settings => Permalinks and simply click on the Save Changes button. Clicking the “Save Changes” button will update the permalink settings since it rewrites the rules or protocols for permalinks. Once you have done this, check if the 404 error has vanished. If the error is still there then go to the next step. Modify Your .htaccess File The .htaccess file controls how your WordPress site interacts with the server and how it generates permalinks for your pages. Restoring it to the default settings can fix the 404 error. You can very easily modify your .htaccess file by going to your website folder which is located in the server. For this you can use a FTP client such as FileZilla. Once you have opened up your .htaccess file simply copy the following code & paste is in the file. After you have pasted the above code don’t forget to save changes before exiting the file. The code will rewrite the rules of interaction between your WordPress site & the server. This might remove the 404 error. If the error still persists then go to the next step. Disable All Your WordPress Plugins Plugins can sometimes be corrupted and have bugs in them. Due to this there might be a compatibility issue which prevents a site from loading properly. Troubleshooting this issue might stop the 404 errors. To deactivate the plugins you can go to Plugins => Installed Plugins from your WordPress Dashboard. Select the Deactivate option from the dropdown, Check the checkbox besides Plugin and simply click on the Apply button. This will deactivate all the plugins. Now check if the 404 error is resolved. If it is resolved then activate one plugin at a time and check again if the error is still resolved. One by one do this with all the plugins and find out which plugin is causing the problem. It may be a tedious thing to do but once you find out which plugin is causing the error, you can delete that plugin. Use WordPress Plugin To Redirect If all the above mentioned ways fail to remove the 404 error then the best possible option is to install a wordpress plugin which will redirect the error page to some other page. The best plugin for this is the Redirect 404 to Homepage plugin. You can simply install and activate this plugin in your WordPress site and it will automatically redirect you from all the 404 error pages to the homepage. You don’t have to do anything. Its a very simple, light weight plugin that does the job for you. In case you don’t know how to install a WordPress plugin check out our article on, how to install and activate a WordPress plugin. You can try out this option if all the other options fail. Conclusion Dealing with the 404 error pages make take up some of your precious time but it is totally worth it. After implementing one or few of these above mentioned ways to resolve the 404 error in WordPress you will no longer have to deal with this frustrating error. You may also like, Track And Redirect 404 Pages In WordPress Site Using AIOSEO How To Make Your 404 Page More Appealing

WordPress Errors The Ultimate Guide
WordPress

WordPress Errors The Ultimate Guide

WordPress Errors The Ultimate Guide will provide you with most of the errors that one faces with respect to their WordPress site. If you are the owner of a WordPress site then you might have come across many errors that are mentioned below. WordPress errors can be a real hindrance, when it comes to the overall performance of website. While some errors may cause minor inconvenience, others can result in major long lasting problem. This in-turn will affect your website’s credibility & the perception of your audience. WordPress Errors The Ultimate Guide In this article, we are not just going to check out the errors but also a possible solution to correct those errors. So, without further ado, let’s begin. White Screen of Death Error This is one of the most common errors that a WordPress site faces. When you try to open your website all you see is a white screen. This error can occur due to variety of reasons, which include plugins, themes, cache etc. To fix this error check out our article on, 5 Ways To Fix The White Screen Of Death Error In WordPress. 404 Page Not Found Error This is another common error in a WordPress site. This error occurs when the post or page someone is trying to access is not found. It can also happen if someone has mistyped the URL by mistake or if there is a problem with the permalink structure of the website. If this error is not fixed then the audience will get frustrated and might decide to opt out of your website. 404 errors can also damage the overall Search Engine Optimization (SEO) of your WordPress site. To fix this error, check out our article on 4 Easy Ways To Fix 404 Error In WordPress.

5 Ways To Fix The White Screen Of Death Error In WordPress
WordPress

5 Ways To Fix The White Screen Of Death Error In WordPress

In this article you will see the 5 ways to fix the White Screen Of Death error in WordPress. It is one of the most common error, when you are dealing with a WordPress site. The main issue with this error is that, the entire screen goes white blank and there is no error message and so at times it can be irritating to find out what the exact problem is. 5 Ways To Fix The White Screen Of Death Error In WordPress So, without further ado, let’s dive right into the problems that cause this error and see the 5 ways to fix the White Screen Of Death error in WordPress. Deactivate all the plugins One of the most basic problem that is causing the White Screen Of Death error is a bad plugin. If you have access to your WordPress site’s admin area then log in to the website and deactivate all the plugins. To deactivate the plugins you can go to Plugins » Installed Plugins from your WordPress Dashboard. If you don’t have access to your WordPress site’s admin area, you will have to deactivate all the plugins via FTP such as FileZilla. Connect to your WordPress site with the help of your FTP client. Once you have connected, go to the wp-content folder where you will see the plugins folder. Right click on the plugins folder & then simply rename the folder to plugins-deactivated. If the issue is fixed, then enable one plugin at a time and check if the website is loading properly or not. Once you find the plugin causing the issue, you can delete it permanently. Out of the 5 ways to fix the White Screen Of Death error in WordPress, this is one of the most important and relevant solution. This solution might solve the problem up to 70%. Change Theme To Default Theme In case the error does not get resolved with the plugins troubleshooting, then you can try out this solution. Sometimes, the theme that you are using may have some development issues & this may cause the White Screen Of Death error. To resolve this, simply replace the current theme with your WordPress site’s default theme. For replacing your current theme with the default theme, go to Appearance => Themes and Activate your default WordPress site theme. If you don’t have access to your WordPress site’s admin area then you can access the themes folder via FTP such as FileZilla. Once you are connected to your WordPress site via FTP find the themes folder and delete the current theme from it. This will automatically prompt WordPress to start using it’s default theme. In our case the Twenty Twenty-Two theme will be activated. Clear Your WordPress Site Cache This is one more common reason for your WordPress site to show the White Screen Of Death error. In order to correct the error, you will have to clear the cache using a plugin such as WP Super Cache. If you don’t already have the plugin then you need to install it. In case you don’t know how to install a WordPress plugin then check out our article on, How To Install And Activate A WordPress Plugin. Once you have installed the plugin, go Settings => WP Super Cache => Delete Cache Increase Memory Limit Of Your WordPress Site If you are still seeing the White Screen Of Death error after trying some of the above solutions, there might be a problem with the memory limit of your WordPress site. You site might have exhausted the default memory. In such a case you will have to assign more memory to your website. This can be done through by editing your wp-config.php file and adding the following code to it. This code increases the PHP memory limit to 256MB for you WordPress site. Once you have added the code, save the changes before exiting. You can now check if the error has disappeared. Increase Text Processing Capability Even after following the above steps the error is still there then there might be a more not so common cause for it. Sometimes the problem might occur because of a page or post is particularly long. If this is the case, you can try adjusting the PHP text processing capability on your site, by increasing the backtrack and recursion limits. Go to your wp-config.php file & paste the following code. After inserting the above code don’t forget to save the changes before exiting your wp-config.php file. Conclusion Above mentioned are the main culprits for the White Screen Of Death error for your WordPress site. If you apply the given solutions, your problem would be resolved the error would no longer trouble you.

9 WordPress Plugins For Business Websites
WordPress

9 WordPress Plugins For Business Websites

Interested in knowing about the 9 WordPress plugins for business websites? Don’t worry, you have come to the right place. Today’s article will discuss a few plugins which a business website should have. Plugins are the lifeline of any WordPress website. It gives desired functionality to the website with just a click of a button. There are thousands of plugins developed to enhance the functionality of WordPress. 9 WordPress Plugins For Business Websites So, without further ado, let’s check out the list of 9 WordPress plugins for business websites. WPForms When someone builds a business website it becomes mandatory for them to include a functionality which allows people to contact them usually through a contact form. This functionality has already been developed by WPForms in form of a plugin which can be installed very easily in your wordpress website. WPForms is one of the most user friendly contact forms you can get. It has the functionality to easily create contact forms, email subscription forms, online order forms, payment forms, surveys and polls forms with just a few clicks. You can either download the plugin through the their website or install it directly from the plugin window in your wordpress admin. Yoast SEO SEO is Search Engine Optimization and it helps the owner to get more visitors to the website. WordPress is SEO friendly by nature and Yoast SEO is one of the most popular WordPress plugin for making the website more visible through search engines. Yoast SEO also helps the owner to add meta tags, generate sitemaps, connect your site to Google Search Console, optimize it for social media and many more. Yoast also detects change of URLs and create auto-redirects, so you don’t have any broken links on your website. You can download the plugin from the WordPress website or from Yoast website or install it directly through the Plugins Tab in your WordPress Admin. OptinMonster The OptinMonster WordPress popup plugin will help the business owners grow their email list and get more subscribers with popups and other types of high converting opt-in forms. OptinMonster is a standalone application that easily integrates with all website platforms including WordPress as a plugin. The plugin can be downloaded at the official website of OptinMonster, or WordPress website or install it directly through the Plugins Tab in your WordPress Admin. Sucuri Security for a business website is of paramount importance and the Sucuri Security WordPress plugin provides a solution to this particular aspect. It is free for all WordPress users. It is a security suite meant to complement the existing security posture. Also, it offers its users a set of security features for their business website, each designed to have a positive effect on their security posture, Security Activity Auditing File Integrity Monitoring Remote Malware Scanning Blacklist Monitoring Effective Security Hardening Post-Hack Security Actions Security Notifications Website Firewall (premium) You can download the plugin at the official website of Sucuri or official WordPress website or install it directly through the Plugins Tab in your WordPress Admin. CSS Hero WordPress themes rely on CSS for the visual appearance of your website. If you want to make customization to your theme, then you will have to learn CSS. This can be time-consuming for a business owner. CSS Hero is a WordPress plugin that allows you to customize any WordPress theme without writing a single line of code. It helps you customize any WordPress theme available in the market within minutes to match your needs. Google Apps Login Google Apps Login is for the existing WordPress user accounts to login to your website using Google to securely authenticate their account. Say for example if someone are already logged into their Gmail account, then then can simply click through the WordPress login screen without the need for username or password. Google Apps Login practices the latest secure OAuth2 authentication, which includes the 2 step authentication also formerly known as Google Apps and G Suite accounts. It is much simpler to configure than the SAML protocol. This WordPress plugin is used by hundreds of organizations from small schools to large public companies. All you require is to have admin access to any Google Workspace domain, or a regular Gmail account, to register and obtain two simple codes from Google. SEMrush SEO Writing Assistance SEMrush is an all-in-one marketing tool kit for digital marketing professionals and business owners. The SEMrush SEO Writing Assistant provides instant recommendations for content optimization based on the qualities of Google’s top 10-ranking pages for your given keywords in a given location. Content professionals, bloggers and marketing experts can check if their texts or the texts of external writers meet various content-quality requirements in just a few clicks. Overall score – checks the article’s general quality calculated according to metrics such as readability, text length, and target keywords. Readability score – evaluates your text’s difficulty based on the recommended Flesch-Kincaid reading-ease score. You will get recommendations for sentences and words that need improvement. Target keywords – shows recommendations regarding the given keywords, their volume and their difficulty. Recommended keywords – shows semantically related keywords, that should also be added to your text. Tone of voice – make sure that your writing is consistent with the desired level of formality. Plagiarism – validate that your writer has submitted original content. Linking – check your links for possible errors and problems. You can download the plugin at the official website of SEMrush Writing Assistance or the official website of WordPress or install it directly through the Plugins Tab in your WordPress Admin. Live Chat When it comes to a business website having a chat functionality connects you directly to the clients and end-users. Live Chat plugin delivers such a functionality which is very easy to implement and use. It also allows for instant communication with on-site visitors and enables prompt resolution to their questions or concerns. This plugin can not only help the website owners to increase their sales but also allows to build stronger customer relationships. You can

5 Top Newsletter Plugins For WordPress Site
WordPress

5 Top Newsletter Plugins For WordPress Site

Want to know about the 5 Top newsletter plugins for WordPress site? Newsletter is nothing but a bulletin issued from time to time. A newsletter informs your subscribers about the updates of your company or a new article that you have posted on the blog. We are going to check out the 5 Top newsletter plugins for WordPress site. Some of them have both free & paid versions available. We are also going to discuss all aspects such as the features, plans, pricing, pros and cons of these plugins. 5 Top Newsletter Plugins For WordPress Site So, without further ado, let’s dive right into the topic. Email Subscribers And Newsletters (Icegram) This is one of the best plugins in the market today. It has got both paid & free versions, but, the free version of this plugin is better than paid version of various other plugins. In true sense, Email Subscribers & Newsletters plugin from Icegram is an all-rounder. It is one of the most reliable email marketing tools for creators and marketers & has been installed in over 100,000+ websites. When you think of any plugin, you start to wonder about the pro & cons of it. Honestly, there are no cons for this plugin. It’s just perfect the way it is. Important Features Send emails & newsletters to unlimited contacts. Lets you add captcha for blocking spams. Gives your power to automate email sequences in advance. Maintain an email list with zero invalid email addresses. Keeps a track of who has opened your emails & gives you analytics. You don’t require a 3rd party service to send email. WordPress cron does the job for you. Plans & Pricing Open Source – $0 for unlimited contacts Starter – $9 per month billed annually Pro – $129 per year billed annually Mailchimp Mailchimp is an all-in-one Email Marketing Platform for small & big business. Millions of users from all around the world uses Mailchimp email marketing services to grow their businesses. It helps you in creating engaging newsletters, managing email subscription lists, sending emails to the right lists. The company was founded in 2001 and is headquartered in Atlanta. It also has offices in Brooklyn, Oakland, and Vancouver. Important Features Create engaging & targeted emails. Drag and drop builder for creating appealing emails templates. Also has built-in templates. Send prompt transactional emails with SMTP. Plans & Pricing Free – $0 (Monthly email send limit is 10,000 sends & daily limit of 2,000) Essentials – $11 per month Standard – $17 per month Premium – $299 per month These rates are applicable in you have around 500 subscribers. As your subscribers increase, so does the rates. MailPoet MailPoet is another awesome plugin after Emails & Newsletters from Icegram to create, send, manage, and grow your email marketing campaigns, all from your WordPress dashboard itself. It’s newsletter builder integrates smoothly with WordPress so any website owner can create beautiful emails from scratch, or by using our responsive templates that display flawlessly across all devices. Schedule your newsletters, send them right away, or set up new blog post notifications to send automatically, in just a few clicks. Over 500,000+ WordPress websites use the plugin. With their free plan you can send unlimited number of emails if you have not more than 1000 subscribers. If you have more than 1000 subscribers then you will have to upgrade to their paid plans. MailPoet is suitable for both beginners as well as experienced users. Important Features Allows you to create email opt-in forms. Let’s you automate your emails. Manage your email subscriber list & everything else from WordPress dashboard itself. Has a drag and drop email builder. Tracks emails sent & give complete analytics. Unlimited number of emails up to 1000 subscribers. Plans & Pricing Free – $0 for up to 1000 subscribers Business – $10 for up to 500 subscribers Agency – $30 for up to 500 subscribers For the Creator, Business & Agency plans as the subscribers go up, so does the price. Newsletter The Newsletter plugin also comes in the category of free awesome emails & newsletters plugin for WordPress. It offers a wide range of options & is one of the most popular plugins. If offers a range of tools to easily use the plugin. Newsletter is an email marketing plugin for your WordPress blog which is perfect for list building, creating & sending e-mails and tracking your email opens. It also has a drag and drop composer to make your campaign creation a piece of cake. Important Features Allows you to add unlimited subscribers Allows you to send unlimited emails & newsletters. Tracks the emails & newsletters for analytics Compatible with every SMTP plugin. Allows you to customize the campaign templates. Plans & Pricing The plugin has a free version available. There are paid versions as well. Blogger – $48 for One Year Agency – $188 for One Year OptinMonster OptinMonster is one of the best emails & newsletters lead generation plugin for WordPress. It helps you attract visitors, increase page views, collect email addresses, and generate more revenue by displaying exciting marketing popups and opt-in forms. The plugin is supported by all the major email marketing services such as Mailchimp, Sendinblue, AWeber etc. OptinMonster has some 100+ templates & it gives your full freedom to modify & create your campaigns. You can have pop-ups, floating bars, scroll boxes, exit intent detection & geo-location targeting. Important Features Drag and drop campaign template builder. Different types of campaigns. Allows you to set triggers for different campaigns. Seamless integration with services like Mailchimp, Sendinblue & AWeber. Allows you to target & track your campaign data analytics. Plans & Pricing Unfortunately there is no free version for OptinMonster. There are only paid versions. Basic – $9 per month (Billed Annually) Plus – $19 per month (Billed Annually) Pro – $29 per month (Billed Annually) Growth -$49 per month (Billed Annually) Conclusion Emails & Newsletters are an integral part of any website or blog. WordPress plugins make is easier for you to gain subscribers &

Speed Up WordPress The Ultimate Guide
WordPress

Speed Up WordPress The Ultimate Guide

Speed Up WordPress The Ultimate Guide will give you all the important techniques to speed up your WordPress site so that you can rank higher on the search engine. Many websites and blogs are being developed in WordPress nowadays and this market is growing rapidly. WordPress is one of the best platforms out there for building a fast and responsive website. When anyone visits your website, all the pages should open quickly and the website should load without any problem even though the internet speed is not that great. To achieve this, we can make our WordPress site more responsive. Google has released an update, which takes the speed of your loading website into consideration. If your website is loading slow, then it will not list or rank higher. Moreover, Google prefers mobile friendly websites as well. LCP – Largest Contentful Paint FID – First Input Delay CLS – Cumulative Layout Shift If the LCP is below or equal to 2.5 seconds, FID is below or equal to 100 milliseconds & CLS is below or equal to 0.1 then it is considered good. Before we check out all the unique techniques to speed up your WordPress site, you need to check the current speed of your website & make a note of it. Speed Up WordPress The Ultimate Guide Choose Web Hosting Optimized For WordPress While hosting a WordPress website, one should remember to choose a web hosting company which is known for its optimized performance. Many of your friends would suggest you a local company but it may not be necessarily good. There are a few companies which are really good for hosting purposes such as SiteGround and Bluehost, which also offer many add on options. Check out Bluehost Vs Siteground Detailed Comparison to make an informed decision between both the hosting providers. Upgrade To The Latest Version Of PHP As you might know that a WordPress website is primarily developed PHP language. If you make a new installation of a WordPress site, it will automatically have the latest version of PHP. But, if you already have a website then please do check the version of PHP and if its not the latest version then please upgrade it to the latest version. As of today the latest PHP Version is 8.0. This will help you increase the speed of your website tremendously. Update your WordPress version WordPress development is an ongoing process & it gets regular updates every now & then. Updating to the latest version is not just mandatory but also highly recommended, in order to keep your website up and running. As of the day of writing this article, the latest WordPress version is 5.9. With the updates you get more features, which in turn makes your website perform better. Before you update to the latest version, don’t forget to create a back up of your WordPress site so that you can roll back in case of any problems with the update. Select A Fast Loading WordPress Theme One of the most important parts of any website is, how it looks to the audience, and for that you have to select an attractive theme. But at the same time the theme should also load up quickly, so choose an appropriate theme. If you are using old themes, it may give you problems to load fast since its already outdated, so choose the newest possible theme. I am using a theme named Page builder Framework which is one of the most fast and responsive themes in the market. The theme is built for performance & is under 50kb on the front-end which helps it loads super fast. Check out our article on 9 Free WordPress Themes That Are Awesome & also Things To Do Before And After Changing A WordPress Theme. Update Your Themes And Plugins Keeping your themes or plugins up to date is mandatory, if you want to speed up your WordPress site. With each new update of a theme or a plugin new & better features are added which avoids the slowing down of your website. Updating to newer versions can also protect your from hackers who are trying to break in to your WordPress site. Also, lot of resources are saved. Optimize Your Images For Fast Loading Every website has many images on them and it takes some time to load those images from the server. To reduce the amount of time taken for loading, optimize the images so that they load faster. But at the same time do take care of the quality of those images, i.e. resolution. An average website transfers around 900 kilobytes of images per URL. Using the right image format can also significantly reduces the size of the image. At times, just changing the file format from .png to .jpg has given up to 80% reduction in size. You can check out detailed article on, How To Optimize Images For Your WordPress site. Convert Your Images To WebP Format If you can convert your images to WebP Format then, it can do wonders to the speed of your WordPress site. The images load faster due to the reduced file size and are also supported by PageSpeed insights requirement to serve images in next-gen format. There are many plugins available to convert your images to WebP format. One of the most highly rated plugins in the WordPress repository is WebP Converter For Media. It will help you a lot in saving potential image space, resizes images and converting them to the WebP format. Other ways of converting your images to WebP are to use any online converter or Photoshop. WordPress handles the WebP images with no issue and your images will not break. Lazy Load Your Images If your WordPress site has lots of images then obviously it will take a lot of time to get them loaded. Also, a lot of resources are being used to load so many images. Due to all this, the WordPress site becomes slow &

Top 5 WordPress Plugin For Internal Linking
WordPress

Top 5 WordPress Plugin For Internal Linking

Want to know more about the top 5 WordPress plugin for internal linking of your WordPress site? An internal link is any link from one page on your website to another page on your website. When it comes to On-Page SEO, internal linking of the website becomes an important factor. A search engine crawls the links on your website, to discover content and to rank this content in the search results. If a post or page gets a lot of links, this is a signal for the search engine, that it is an important or high-value post or page. In today’s article we are going to deal with the following topics, What Is Internal Linking Of Website As the name suggests, internal linking of the website is nothing but, linking the pages and posts of your website with each other. There are two types of internal links, Incoming Internal Links: The link coming to a post from another post is known as incoming internal link. Outgoing Internal Links: From the post, a link going to another post is known as outgoing internal link. For example, consider the below posts, from my website BloggersDomain. Exclude Certain Categories And Tags From WordPress Search Exclude Certain Posts Or Pages From WordPress Search I can link these two posts internally in a simple manner. Since the posts are related to each other and are similar in nature, I have shared the URL of Exclude Certain Categories And Tags From WordPress Search on another post i.e. Exclude Certain Posts Or Pages From WordPress Search and vice versa. By sharing the URL’s of the posts with each other, the posts will get internally linked raising its value in the search results. The search engines uses internal links to the posts on your website. Your audience who view your website can also use internal links to navigate from one post to another related post. Why Is Internal Linking Required As mentioned above, When it comes to on-page SEO, internal linking of the website helps a lot. Search engines use internal links to navigate your site from one post or page to another post or page. If there are no internal links on your website, search engines may miss out of many important posts and pages, making it difficult to index your website properly, in-turn reducing the number of audience and revenue of your website. So, one should take internal linking of the website seriously. Top 5 WordPress Plugin For Internal Linking There are many plugins available which can help you to link your WordPress site internally, without much of a fuss. Some of them are mentioned below in detail. WP Seo Auto Linker If you want to automatically link your website content, WP SEO Auto Linker will help in getting this done easily. Simply, create a new keyword or a new phrase, and the system will link that keyword or phrase to your chosen DoFollow URL. Through the settings, it is easy to fine tune the workings of this plugin. For performance, it is best to make use of a caching engine. Using this plugin didn’t just help define cornerstone content in the SEO strategy, but also increased page views by around 18%. Link Whisper Free This WordPress plugin named Link Whisper Free quickly gives you internal link suggestions that can both help your audience to find content on your site and search engines to crawl and rank your website better due to the improved link structure. It also helps you take what was once a time consuming activity and turns it into an opportunity for you to have a better optimized website as it starts suggesting relevant internal links when you start writing your article. Yet Another Related Posts Plugin (YARPP) Yet Another Related Posts Plugin (YARPP) displays pages, posts, and custom post types related to the current entry, informing the audience of other relevant content on your website. YARPP Basic for Standard Features Thumbnail or list view of related content. Related posts, pages, and custom post types. The YARPP templating system gives you advanced control of how your results are displayed. Using a customizable algorithm considering post titles, content, tags, categories, and custom taxonomies, YARPP finds related content from across your site. Display related posts in RSS feeds with custom display options. Internal Link Juicer Internal Link Juicer is the state of the art solution for building internal links within post content. It works by using an intelligent per-post configuration of your desired keywords. Overall, it improves your On-Page SEO and the audience experience, by pointing out the right content for the given context. Some features for the free version include Maximum diversification: With the intelligent placeholder feature, anchor texts can be diversified and the amount of possible links boosted with little effort. This also ensures a natural linking behavior. Automation: You don’t have to link your pages manually every time you create a new post. Once your keywords are configured, links will get built automatically. Full control over linking pages: Individual posts that shouldn’t contain generated links can be added to the blacklist. Post types, which should be used for linking, can be whitelisted. These options give you full control over the plugin. Customize your link output: With the possibility of our predefined template tags, link output can be completely individualized. This lets you customize generated links for your individual context. Configurable linking behavior: Link counts per page, as well as links per target URL and linking behavior for targeted keywords, can be flexibly configured using the options. You’ll have full control for every use case. Stay in the loop: Despite our “set and forget” approach and the automation that goes with it, you’ll never lose track of what’s going on within your dashboard. Perfect workflow: The plugins keyword panel in the post editor guarantees an efficient and stress-free workflow. Best possible performance: With the high-performance index structure, you’re guaranteed a fast rendering of your pages on the front end. You don’t have

6 Best Forum Plugins For WordPress Site
WordPress

6 Best Forum Plugins For WordPress Site

Interested in knowing about the 6 best forum plugins for WordPress site? Keep on reading to find out the answer. Many blogs and website have an additional section nowadays to extend the functionality of that website. A forum is such an example. A forum may be used for discussion on the relevant topics or to share some photos or videos etc. In today’s article we will see, what a forum is and different plugins available in wordpress for creating a forum. What Is A Forum A Forum, also known as Message Board, is an online discussion board, where people can communicate with each other in the form of Questions and Answers which are related to the topic of relevance. For example, consider that, the topic of relevance is Technology. People can ask questions with respect to technology, on the forum and those who know the answers can respond to those questions. Also, depending on the access level of a user, a posted question or an answer might need to be approved by a moderator before it becomes publicly visible. Conversations on a single topic is called a “thread”. A forum is hierarchical or tree like in structure. A forum can also contain a number of sub-forums, each of which may have different topics. There is no need to log in or register, to read the topics or threads from the forum. But to ask or answer a question, you will have first register and log in to the forum, only then can a question be posted or answered. One can create such a Forum website with WordPress & it’s plugins. 6 Best Forum Plugins For WordPress Site bbPress If you are you looking for a timeless, elegant, and streamlined forum then this is the right plugin for you. bbPress is simple, easy to integrate, easy to use, and is built to scale with your growing community yet infinitely powerful, built by the WordPress community themselves. You can install the plugin from your own wordpress blog or directly from the bbPress page on wordpress.org website. The plugin along with all its extensions is absolutely free to install and use. It also has in-built Akismet support, so that spams are kept out. Installing From Your WordPress dashboard Visit Plugins >> Add New Search for “bbPress“ Install and Activate BuddyPress If you are you looking for a completely modern, robust and sophisticated forum plugin with the support of social network software, then BuddyPress is the right one for you. It also has a variety of add-on features through WordPress’s extensive plugin system. BuddyPress focuses on ease of integration, ease of use and extensibility. Just like bbPress, this plugin is also infinitely powerful yet simple. Users can register on your site and create profiles, have private conversations, make social connections, create and interact in groups, and much more. Installing From Your WordPress dashboard Visit Plugins >> Add New Search for “BuddyPress“ Install and Activate wpForo Forum wpForo Forums is one of the best WordPress forum plugins out there. It is a full fledged yet easy and light forum software with unique feature, for your WordPress website. it comes with modern and responsive forum layouts and styles. This WordPress forum plugin brings everything you need to run an efficient and professional community. wpForo Forum plugin is well integrated with many profile builder and membership plugins, such as BuddyPress and Ultimate Members plugins. It has four different forum layouts and designs, such as Extended Forum Layout, Simplified Forum Layout, Question and Answer Forum Layout and Threaded Forum Layout. Also it has six set of different colors & social network share buttons. You will be spoilt for choices with this forum. Installing From Your WordPress dashboard Visit Plugins >> Add New Search for “wpforo Forum“ Install and Activate Asgaros Forum This is an extremely lightweight forum plugin, but at the same time it is also feature rich. It is easy to set up, super fast and perfectly integrated into WordPress. It has also got a powerful editor and a notifications system. Users can upload, search and message. Features (From the Official Website Page) Simple Content Management Profiles & Members List Notifications & Feeds Powerful Editor SEO friendly Reactions Uploads Search Polls Widgets Statistics Ads Management Guest Postings Approval, Banning & Reporting Moderators, Permissions & Usergroups Customizable Responsive Theme Multilingualism Multiple Instances Multisite Compatibility myCRED Integration Installing From Your WordPress dashboard Visit Plugins >> Add New Search for “Asgaros Forum“ Install and Activate Discussion Board – WordPress Forum Plugin Discussion Board – WordPress Forum Plugin is an easy, one-click installation forum software with stacks of essential features that make it one of the most sought WordPress forum plugin. Users can register and log in via a front-end form and post new forum topics. Each forum topic is displayed on its own page where other users can reply. A key feature of Discussion Board is the ability to control separately who can view your WordPress forum and who can actually post to it. You can specify the required role for users to post new topics and, separately, you can specify the required role for users to view topics. So, for instance, you could allow anyone to view the content but only permit specific user roles to post content. It also has shortcodes and spam reduction options. Installing From Your WordPress dashboard Visit Plugins >> Add New Search for “Discussion Board“ Install and Activate DW Question and Answer DW Question and Answer is a WordPress Forum Plugin unlike other, which is essentially a complete Question & Answer system for your WordPress blog. It is quite similar to Quora or Stack Overflow. The plugin supports multi-languages, shortcodes, reCAPTCHA, email notification system and many more. Features (From the Official Website) Submit / Filter / Order / Edit / Delete Question Answer / Comment Vote and Pick Best Answer Notification Email system Instant search by keywords 11+ languages supported Captcha supported Shortcodes available Private/ Public for Question and Answer Questions / Answers

6 Awesome Anti Spam WordPress Plugins
WordPress

6 Awesome Anti Spam WordPress Plugins

Want to know more about the 6 awesome anti spam WordPress plugins? Spamming is a problem that each and every blogger faces at some point in time. Spam is nothing but an irrelevant or unsolicited message sent over the internet, typically to a large number of users, for the purposes of advertising, phishing, spreading malware, etc. When you own a blog, you will get many such irrelevant and unsolicited messages. To avoid this anti-spam plugins can be used in your blog. Below is a list of such plugins. 6 Awesome Anti Spam WordPress Plugins Below is the list of 6 Awesome Anti Spam WordPress Plugins. Akismet Akismet is one of the most popular plugins that has been there since a long time. It checks for comments and contact form submissions against their global database of spam to prevent your site from publishing malicious content. Major features: Automatically checks all comments and filters out the ones that look like spam. Each comment has a status history, so you can easily see which comments were caught or cleared by Akismet and which were spammed or unspammed by a moderator. Compatible with top WordPress plugins such as Jet Pack and Contact Form 7 URLs are shown in the comment body to reveal hidden or misleading links. Moderators can see the number of approved comments for each user. A discard feature that outright blocks the worst spam, saving you disk space and speeding up your site. You will require an Akismet.com API key to use the plugin, once activated. Keys are free for personal blogs whereas paid subscriptions are available for businesses and commercial sites. Stop WP Comment Spam This anti-spam plugin has a free version as well as a pro version. It detects all the spam comments with ease. You can use this plugin for personal blogs as well as commercial purposes. No API is required. Major Features: prevents automated comment spam stores the comment for review in the spam tab remove the spam comments from WordPress after a defined number of days option not to remove comment spam automatically if desired whilst another spam plugin should not be required, as in our opinion this is the best anti spam plugin for comments created by bots, this can run alongside other spam and security plugins Protect your Contact Forms, including Gravity Forms, Contact Form 7 and WPForms Stops fake user registration in WordPress Stops fake WooCommerce Account Registrations from bots Protect against human entered spam, using a machine learning anti spam server Unlimited number of entries checked via the anti spam server Automatically block and discard the worst spam Automatic spam statistics reporting Antispam Bee The next best choice definitely will be Antispam Bee. This plugin has amazing features and the important thing is that, it does not require a registration like many other plugins. You don’t have to fill in any captchas or send personal information to third party services. It is completely free of charge, ad-free and 100% GDPR compliant. Major Features: Trust approved commenters. Trust commenters with a Gravatar. Consider the comment time. Allow comments only in a certain language. Block or allow commenters from certain countries. Treat BBCode as spam. Validate the IP address of commenters. Use regular expressions. Search local spam database for commenters previously marked as spammers. Notify admins by e-mail about incoming spam. Delete existing spam after n days. Limit approval to comments/pings (will delete other comment types). Select spam indicators to send comments to deletion directly. Optionally exclude trackbacks and pingbacks from spam detection. Optionally spam-check comment forms on archive pages. Display spam statistics on the dashboard, including daily updates of spam detection rate and a total of blocked spam comments. WordPress Zero Spam This plugin stops registration spam and spam in comments automatically ,without any additional configuration or setup. Just install, activate and enjoy a spam-free website. The plugin uses server and client side JavaScript key validation to prevent bots from spamming, since the users cannot comment without JavaScript enabled. Major features: No captcha, spam isn’t a users’ problem No moderation queues, spam isn’t a administrators’ problem Blocks 99.9% of spam registrations & comments Supports caching plugins to help provide great performance Blocks spammy IPs from ever seeing your site Extend the plugin with action hooks Theme & plugin integration for any form on your site Optional logging, so you can see who’s trying to spam Advanced settings for complete control This plugin supports, Contact Form 7, Gravity Form, Ninja Forms, BuddyPress and WPForms. CleanTalk As its name suggests, Cleantalk plugin is one of the cleanest plugins available in the market. No Captcha is requires, no questions are asked, there is no need to solve any puzzles, and its universal in nature. Major Features: Comments spam is stopped. Registrations spam is stopped. Contact emails spam is stopped Orders spam is stopped. Bookings spam is stopped Subscriptions spam is stopped. Stops spam surveys, polls. Widgets spam is stopped. Stops spam in WooCommerce. Checks and removes the existing spam comments and spam users. Compatible with mobile users and devices. Compatible with General Data Protection Regulation (GDPR) (EU). Real-time email validation. Is email real or Not. Blocking disposable & temporary emails. No Spam – No Google Penalties. Give your SEO boost. Mobile friendly Anti Spam & Firewall. Stops spam in Search Form. Disable comments. It supports, Contact Form 7, Contact Form by WPForms, Ninja Forms, Gravity Forms, MailChimp, Formidable Forms, WooCommerce, JetPack Comments and Contact Form, BuddyPress, bbPress, S2Member, MailPoet etc. Spam Destroyer The Spam Destroyer plugin stops automated spam while remaining as unobtrusive as possible to regular commenters. The original developer of the plugin was Ryan Hellyer, but many others have contributed code to this project and are now listed as co-authors of the plugin. This plugin is an open software & intended to be effortless to use and is good for small blogs or websites. Simply install, and enjoy a spam free website. Conclusion More famous your website become more spams you will get. The

Create Anchor Links In Your WordPress Site
WordPress

Create Anchor Links In Your WordPress Site

Want to know how to Create Anchor Links In Your WordPress Site? You have come to the right place for the answer. In today’s article, we are going to discuss in detail, about what anchor links are, how to create them and why to create them. Today, for every blog, anchor links have become an essential part. What Are Anchor Links Anchor Links are the links which are used to connect two different section of the same post or a page. For example, I have written a long post and you want to go to a particular section in the post, then you will have to find it by scrolling down and going through the entire post. To avoid this, I can create a link directly connecting to that particular section on the post, so that when you click on the link, you will go directly to the section that you are interested in. You can create anchor links, manually as well as with the help of plugins. Why Create Anchor Links There are a few reasons to create Anchor Links. Anchor links helps the audience to navigate through your website in a much better manner. You don’t want to bore the audience with long posts, otherwise they will leave and never come back. To avoid this, if you create anchor links in your post, the audience can easily navigate through your website, and directly go to the section they are interested in. This will retain your audience by decreasing the bounce rate, and in-turn get you more revenue from your website. Anchor links also tend to show up in search engine results, so it increases your website’s visibility on the internet. Create Anchor Links In Your WordPress Site There are 2 different ways to create anchor links in your WordPress site. Create Anchor Links With Manually Go to your post and select the text you want to link a particular section to. Click on the Link Button and convert the text into and Anchor Link by entering the text with a dash “–” between every word and by adding a “#” at the beginning of the text. The text will look something like #What-Are-Anchor-Links? Go to the text which you want to connect to, and change it to a heading, with the help of the editor. Go to the Block section located in the right side of the page and click on Advance. Fill in the same text as the Link Button in the HTML Anchor tag but without “#“ The text will look something like What-Are-Anchor-Links? Create Anchor Links With A Plugin Easy Table Of Contents is the most easy & efficient way to create anchor links. Install and Activate Easy Table Of Contents wordpress plugin. This plugin allows you to automatically generate a table of contents with anchor links. It uses headings to guess the content sections, and you can customize it as per your needs. In case you don’t know how to install & activate a WordPress plugin then check out our post on How To Install And Activate A WordPress Plugin. Go to Settings » Table of Contents page to configure the plugin settings. By default, the plugin is enabled for Pages. Enable the plugin for the Posts as well in the Enable Support section. You can also enable Posts in the Auto Insert section. This allows the plugin to automatically generate the table of contents for all articles, including the older articles that match the criteria. If you only want to automatically generate table of contents for specific articles, then you can leave this option unchecked. Select where you want to display the table of contents and when you want it to be triggered. You can also change the Appearance and Custom Theme of the table of contents as per your own specifications In the Advance section you will find more setting options. You can customize the all settings as per your specifications. Conclusion If you are a beginner then use the plugin since it very easy to use. If you want to create anchor link for a specific page use the manual method. The Table Of Contents section in this post is taken from Easy Table Of Contents wordpress plugin page.

Optimize Images For Your WordPress Site
WordPress

Optimize Images For Your WordPress Site

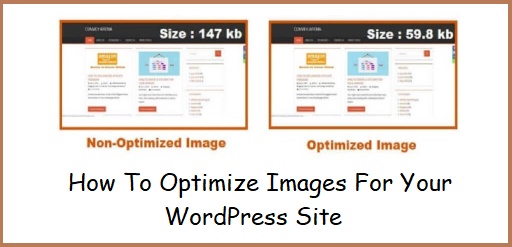
Interested in knowing, how to optimize images for your WordPress site? Well, you have come to the right place for the answer. Optimized images play a huge part in the performance of your website. When you build a website or a blog, optimizing images is one of the most important things you should take into consideration. In today’s article we will take a look at 4 main things. What Is Optimized Image Optimized Image is the image whose size is reduced, without decrease in the quality. This process of reducing the size of an image without affecting it’s quality is know as Image Optimization. Images Optimization is actually quite easy, and anyone can do it from their laptop. If you are using a WordPress website or a blog, you will find many image optimization plugins and tools to automatically compress and optimize images. Image optimization works by using compression technology like ‘Lossy’ and ‘Lossless’ which helps in reducing the over all file size without the loss of quality. Consider the above images. They are of the same website. The only difference between them is that one image is non-optimized with a size of 167 kb, where as the other is optimized with a size of 77 kb. So the reduction in size is 90 kb, but the image quality is still unchanged. Why Is Optimized Image required There are many reasons, as to, why you should optimize an image before using it on your blog. The main reasons include, Helps your website or blog load faster, increasing the speed and performance. Improves the SEO ratings of your website. Reduces the need for storage, which can help in saving money on hosting and CDN services. Saves a lot of bandwidth, which helps in loading your website, even if the internet connection is slow. If you consider the size of all the elements on your website/blog, videos have the highest size, after that comes images and after that comes text. As far as videos are concerned, you can create a YouTube channel, put all the videos there and just share the link on your website. But images are something that you need to save on your website itself, so they should be optimized. Since we know that fast website/blog ranks much higher in search engines, image optimization is something that everyone should take seriously. What To Consider In An Optimized Image This is a tricky question, since many people don’t know what they are looking for. The aspects that needs to be considered in an optimized image are as follows, File Format Of The Image The File format of an image, plays a very important part, in the size of that image. Normally, the images used are by general public are of JPG, JPEG, PNG and GIF format. If you have a lot of content in the image which might increase the size of that image considerably, then save the image in JPG or JPEG format. Or if you have a really simple image, then PNG format can be used. For animation you will have to save the image in GIF format. Personally I prefer the JPEG format. The size of an image in this format is usually less, than the size of an image in any other format. Compression Of The Image Compression of image, plays an important part in the process of image optimization. This image compression can be achieved by many different image editing tools, such as, Adobe Photoshop, Affinity Photo and GIMP. You can reduce the image size up to 75% with compressing the image. Dimensions Of The Image Just like the file format and compression, dimensions of an image also matters. Reducing the dimensions of an image file, can significantly decrease the image size. This can be achieved by simply resizing the images. To give you an example, consider that, I have an image of size, say 2 MB and image dimensions are 3600×1200 pixels. If I change the dimensions of that image to say 1200×900 pixels, it will help me to reduce the size of that image to around 500 kb. That’s almost 75% of reduction. And if you save that image in a JPEG format, it will help in reducing the size even further. Optimize Images For Your WordPress Site As mentioned earlier, there are many options for reducing the size of an image, without affecting its quality. Software like Adobe Photoshop & GIMP, or online photo editors and compressors like Pixlr or TinyJPG or if you are using a WordPress website, then plugins like WP Smush or Resmush.it can be used to achieve highly optimized images. Lets have a look at few in detail. Adobe Photoshop The software includes many features, from photo editing and compositing to digital painting and from animation to graphic designing. Its available for both windows operation system as well as mac operating system. It’s professional photography tools make it easy to do everyday edits or total image transformations across desktop and iPad and allows you to remove objects, crop, retouch and combine photos. TinyJPG Or TinyPNG It uses smart lossy compression techniques to reduce the file size of your JPG files. By selectively decreasing the number of colors in the image, fewer bytes are required to store the data. The effect is nearly invisible but it makes a very large difference in file size. I personally use this website to compress images and have found it absolutely amazing and easy to use. reSmush.it reSmush.it is an image optimizer plugin for WordPress website. It allows to use free Image optimization based on reSmush.it API and provides image size reduction based on several advanced algorithms. The API accept JPG, PNG and GIF files up to 5MB. This plugin also includes a bulk operation to optimize all your pictures in just 2 clicks. Different CMS like WordPress, Drupal, Joomla and Magento use reSmush.it. The plugin includes an option to exclude some pictures of the optimizer. You can either install the plugin

Scroll to Top